Thursday, August 29, 2013

How To Easily Create A Separate Topic Pinned On IP.Board

How To Easily Create A Separate Topic Pinned On IP.Board - Tutorials at IP board, to create and beautify pinned on IP Board fairly easy way, You can follow this tutorial to share.

Follow the tutorial below :
  • Go to ACP
  • Look & Feel
  • Choose Your Skin
  • Go to Forum view and Select Forumindextemplate

And Search for <tr class='header hide'> by pressing ctrl F ( search )
You will see all this:

<tr class='header hide'>

                    <th scope='col' class='col_f_icon'>&nbsp;</th>

                    <th scope='col' class='col_f_topic'>{$this->lang->words['forum_topic']}</th>

                    <th scope='col' class='col_f_starter short'>{$this->lang->words['forum_started_by']}</th>

                    <th scope='col' class='col_f_views stats'>{$this->lang->words['forum_stats']}</th>

                    <if test="canSeeLastInfoHeader:|:$this->memberData['gbw_view_last_info']"><th scope='col' class='col_f_post'>{$this->lang->words['forum_last_post_info']}</th></if>

                    <if test="topicsismod:|:$this->memberData['is_mod'] == 1">

                        <th scope='col' class='col_f_mod short'><input type='checkbox' id='tmod_all' class='input_check' title='{$this->lang->words['topic_select_all']}' value='1' /></th>

                    </if>

                </tr>    

                <!-- BEGIN TOPICS -->

                <if test="hastopics:|:is_array( $topic_data ) AND count( $topic_data )">

                    <foreach loop="topics:$topic_data as $tid => $data">

                        {parse template="topic" group="forum" params="$data, $forum_data, $other_data, $inforum"}

                    </foreach>


and don't forget to replace with this:


<tr class='subhead altbar'>

                                        <th scope='col' colspan='<if test="endannouncements:|:$this->memberData['is_mod'] == 1">6<else />5</if>'>

                                        <if test="$this->hasPinned=0">Forum Topics</if><if test="$this->hasPinned=1">Pinned Topics</if>

                                        </th>

                                        </tr>

                                        </if>

                                        <!-- BEGIN TOPICS -->

                                        <if test="hastopics:|:is_array( $topic_data ) AND count( $topic_data )">

                                        {parse striping="forumTable" classes="row1,row2"}

                                        <foreach loop="topics:$topic_data as $tid => $data">

                                        <if test="$data['pinned']">

<if test="$this->hasPinned=1">

</if><else />

<if test="$this->hasPinned">

<if test="$this->hasPinned=0">

</if>

<tr class='subhead altbar'>

<th scope='col' colspan='<if test="endannouncements:|:$this->memberData['is_mod'] == 1">6<else />5</if>'>

Forum Topics

                                        </th>

</tr>

</if>

</if>

                        {parse template="topic" group="forum" params="$data, $forum_data, $other_data, $inforum"}

                    </foreach>


Check preview :

 results :


It is How To Easily Create A Separate Topic Pinned On IP.Board, Hopefully useful and useful for you. Good luck!

Wednesday, August 28, 2013

How To Easily Group Name Colors On vBulletin

How To Easily Group Name Colors On vBulletin.  This is one of the easiest things in vBulletin - just posting this for our beginner. This post will discuss easy and practical way to change the color of names in vBulletin. Please follow the instructions and tutorial correctly below.

Follow the tutorial below :
  • Go to AdminC
  • Usergroup
  • Usergroup Manager
  • Edit usergroup. You have to do this for each usergroup that you like to be colored.
  • Add this code in username HTML Markup

Html to be replaced and can be used to change the color of names such as

First Box :
<span style="color: XXXX;"> 

Next colour html check :
Replace code "XXXX" with your color name/code, phrase colour html check at www.w3schools.com for a HTML Color Table.

Second Box :
</span>

next save it and you're done


Added more elaborated content, just expand this spoiler.
First Box: <span style="color: red;">
Second Box: </span>
= username

First Box: <span style="color: green;">
Second Box: </span>
= username

First Box: <strong><span style="color: red;">
Second Box: </strong></span>
= username

First Box: <strong><span style="color: green;">
Second Box: </strong></span>
= username


How To Easily Group Name Colors On vBulletin


How To Easily Group Name Colors On vBulletin, that may be useful to You. Good luck!

Tuesday, August 27, 2013

How To Add A Custom Tab On XenForo

How To Add A Custom Tab On XenForo. Ever want your user upgrades to have their own tab? well look no further. You will need to go

Follow the tutorial below :
  • Admin Cp
  • Appearanc
  • Style
  • Your Skin
  • Templates

Once your in templates go to "navigation"

Search for this once your in navigation

Code:
<!-- extra tabs: end -->
     <xen:if is="{$extraTabs.end}">
     <xen:foreach loop="$extraTabs.end" key="$extraTabId" value="$extraTab">
         <xen:if is="{$extraTab.linksTemplate}">
             <li class="navTab {$extraTabId} {xen:if $extraTab.selected, 'selected', 'Popup PopupControl PopupClosed'}">


Right above it add this code

Code:
<li class="navTab PopupClosed"><a href="{xen:link account/upgrades}" class="navLink">Premium</a></li>


and boom your own tab for user upgrades

How To Add A Custom Tab On XenForo

How To Add A Custom Tab On XenForo so hopefully can help you. Good Luck!

Monday, August 26, 2013

How to Easy Install Skins MyBB

How to install MyBB skins for your forum. Discussion which will be distributed today is how to install MyBB forum into your hosting. Its actually pretty easy way, everyone would have understood if the following tutporial to share this. Please read and follow the tutorial below with either.


What you will need:
  • A skin you want to install
  • ACP access
  • FTP access


Tutorial How to Easy Install Skins MyBB :

1) Open up your FTP client and connect to your web server.


2) Select the folder that contains all the images of your skin. In this case, the 'agile' folder would be my selection.


How to Easy Install Skins MyBB
3) Drag and drop the folder into the images folder on your webserver.


4) Wait for the queued files to finish uploading. In my case, there were 244 files that need to be uploaded.


5) Once done, exit your FTP and log into your ACP.


6) Go to 'Templates & Style' > 'Import a Theme'.


7) Click on the button and chose the .XML file that was included in the skins you downloaded.

8) Once done, give your skin a name and click and you're finished.

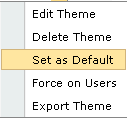
9) Optional. To make the skin you imported the default skin, go to the 'Templates & Style' tab. Go to your skin and click  , then click


Hope you found this useful.


Note
You may also install the .XML file first, then uploads the images into your FTP. The result should remain the same.

Thus How to Easy Install Skins MyBB, hopefully useful and good luck!

Sunday, August 25, 2013

How to disable IP Logging On IP.Board

How to disable IP Logging On IP.Board. Very usefull! You replace the ip's with a custom ip adress. Here's an easy way and the most practical disable IP Loggin. Please follow the instructions and tutorials are given below correctly and accurately.

1. Go to :
admin/sources/base

2. Find it :
ipsRegistry.php

3. Edit with an editor (f.x. notepad++) | Search line (line 3794):
//-----------------------------------------
// Make sure we take a valid IP address
//-----------------------------------------

4. Add below:
self::instance()->ip_address =  '0.0.0.0';


Optional: Replace the 0.0.0.0 with your favorite "ip number"


It is How to disable IP Logging On IP.Board, hopefully useful!